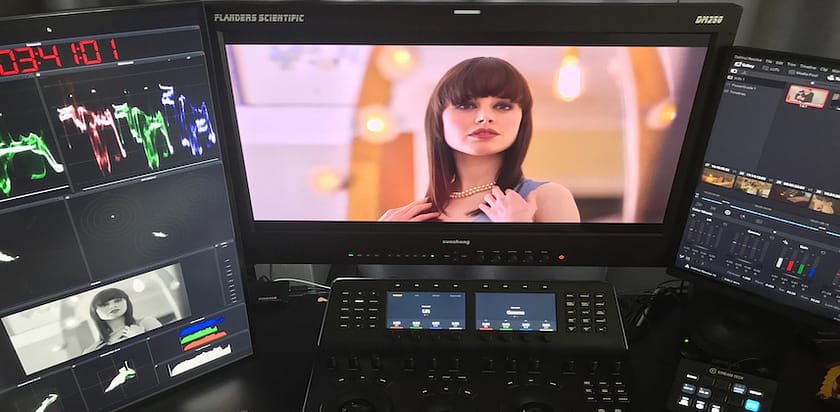
Little Gems #5: Automatically Sort Your Timelines Into Folders

In Little Gems #4 I lamented that Resolve 12 Public Beta 1 mixes our timelines with our Media

I mentioned how much this irked me. And over on MixingLight.com, in our podcast about the things that annoyed us in Resolve 12, both Dan Moran and I were vocal about this change of behavior—which is very different from all previous versions of DaVinci Resolve.

In fact, I surprised myself by how strongly I felt that Resolve 12’s new behavior was completely messing up my long-established workflows. I made heavy use of how Resolve separated folder structures for Media vs. Timelines.

It turns out, Dan and I weren’t the only ones complaining about this new behavior

On the Blackmagic forums, I’d frequently read Resolve 12 feedback lamenting the loss of Timeline Folders. Now, if you have any doubts that Team DaVinci Resolve aren’t listening to user feedback… then behold—brand new to Resolve Public Beta 3:

Little Gem #5: Create ‘Timeline Bins’

In Gem #4 I pointed out the ‘Create Smart Bin for Timelines’ checkbox in Project Settings. With the release of DaVinci Resolve Public Beta 3, that same Project Settings sub-menu has a brand new checkbox:

The New Timeline Bin Option in DaVinci Resolve 12 Public Beta 3

Enable this new setting to reveal a new separate Timeline management folder structure

Enable the ‘Use Timelines Bin’ to reveal a new Timelines-only Folder 

When you enable this option, in the Media Pool and on the Edit Page, a brand new folder appears that IS NOT a Smart Bin!

A new 'Timelines' folder is revealed!

When  ‘Use Timelines Bin’ in enabled, a new ‘Timelines’ folder is revealed. Resolve automatically sorts Timelines in this folder, keeping them separate from Media!


This option forces all Timelines to ONLY appear in the Timelines folder (or subfolders). And Media will only appear on the ‘Master’ folder (or subfolders).

When is this option super-useful?

If you ever work on a campaign where a client hands you 15 XMLs, with this new option enabled—importing the XML will place all the Media in the ‘Master’ folder and the timelines in the ‘Timelines’ folder. You can also create Timelines sub-folders for easy timeline management:

Timelines folders in DaVinci Resolve 12

Once you enable ‘Timeline Bins’ you can create an entire folder structure to drag and drop timelines.

THIS is what I’ve been wanting ever since I saw my first version of Resolve 12! And yes, this is now my favorite DaVinci Resolve 12 Little Gem 🙂

Be aware: There is one Rule to enable the ‘Use Timelines Bin’ Project Setting…

You can’t enable the ‘Use Timelines Bin’ setting if you have already created ANY timelines. You can enable this option if there’s media in the Media Pool but once a timeline is created, you can’t decide to enable (or disable) that setting without deleting all timelines in the project.

In truth – this doesn’t bother me at all.

But if I could ask for one feature enhancement?

It would be to make this feature enabled as DEFAULT.

After all, this is how previous versions of Resolve have worked. And it’s a behavior that FCPX has semi-adopted and all the other NLEs *should* adopt. Timelines are NOT media. Timelines are Metadata and should always be isolated from media and deciding to co-mingle timelines and media should be an optional behavior.

Still, a HUGE shout-out to Team DaVinci Resolve for listening and implementing this behavior! Thanks!

– pat

Comments { 0 }

Little Gems #4 – Automatically Organize Your Timelines in DaVinci Resolve 12

The key lies within Project Settings

I’m not a big fan of how DaVinci Resolve 12 Beta co-mingles Timelines and Media within folders. In previous versions, Timelines were segregated from Media files, making it super-easy to find and organize timelines separately from Media.

Here’s an example of why Resolve 12 Beta’s new behavior drives me a bit crazy:

Prior to DaVinci Resolve 12 Beta, if you imported an XML, the Media files would go into the Media Pool while the associated timeline would end up in its own ‘Timelines’ window. This makes total and complete sense. Resolve just naturally helped me keep my projects organized.

In Resolve 12 Public Beta, now the imported timeline gets dropped into the Media Pool (never mind the cognitive dissonance of dropping Timelines into the Media Pool) – the imported timeline also gets dropped into the same folder as the imported Media. If you’ve got clients who send you up to 15 timelines to color grade (as I do) and if you like to segregate the imported Media into unique per-timeline folders (as I do), then you’ve now got 15 timelines scattered throughout 15 folders in your Media Pool.

Smart Bins is one solution to fixing Resolve 12’s new behavior

Using the options shown below, you can create your own ‘Timelines’ Smart Bin. But doing this every day, for every project, is mostly tedious. It’s just One. More. Thing. To. Do. before starting your session.

How to create the 'Timelines Smart Bin' in DaVinci Resolve 12 Public Beta

The ‘Create Smart Bins’ dialog box with options selected to create a ‘timeline smart bin’.


Little Gem #4: The easier, quicker way to create a ‘Timeline Smart Bin’

In Project Settings, click into the ‘General’ section and in the UI Settings submenu, look for the ‘Create Smart Bin for Timelines’ option.

Set Resolve 12 to automatically generate a Timeline Smart Bin

Go: Project Settings > General to find the ‘Create Smart Bin for Timelines’ option


After enabling the checkbox and saving your settings, jump back into the Media Pool and you’ll find this:

The automatically generated 'Timelines Smart Bin' in DaVinci Resolve 12

After enabling the checkbox, a new ‘Timelines Smart Bin’ is automatically created.


Now, every timeline scattered across your entire Media Pool will be listed here. While I still prefer the pre-Resolve 12 behavior, manually creating a Timeline Smart Bin is tedious enough that I’m calling this workaround a ‘Little Gem’.

– pat

Comments { 5 }

Little Gems #3 – Curves ‘Snap-To Neutral’ Command

What’s one of the fun things when working in a brand new, completely updated version of the software you use professionally? Why, discovering all the little features that didn’t make it into the marketing material! That’s what this little series is about. As I discover nifty stuff about Resolve 12, I’ll point them out right here in this Little Gems series.


DaVinci Resolve 12: Snap a Curves point back to neutral

Have you ever placed a point on a Curve, only to add a second point to isolate the first point to a very specific part of your image? In DaVinci Resolve 11 and earlier we had a grid in the Curves area to help us bring our control points back to neutral. In DaVinci Resolve 12, there is no grid to help us find the neutral position. This brings us to…

Little Gems #3: ‘Snap to Neutral’ Curves command in DaVinci Resolve 12

I learned this Little Gem while chatting on the phone with Blackmagic’s Alexis Van Hurkman. I thought it was a bug—and Alexis clued me in otherwise… After placing a control point: As you click and drag a control point back to neutral, hold down the option key to reveal ‘neutral’:

Click-drap and press Option to snap a Curves point to Neutral

A new command in DaVinci Resolve 12: Click-drag+Option to reveal the ‘neutral line’ and snap your control point to it.

With a point selected, and while option-dragging, a line pops up showing you the neutral centerline. Keep dragging and the point will SNAP to neutral! Let go of the option key to make a slight move off the neutral line. No more second-guessing yourself.

One of my favorite Little Gems so far in DaVinci Resolve 12.

– pat

Comments { 3 }

Little Gems #2 – ‘Ignore THIS Track’

DaVinci Resolve 12: New timeline navigation option in the Color page

What’s one of the fun things when working in a brand new, completely updated version of the software you use professionally? Why, discovering all the little features that didn’t make it into the marketing material! That’s what this little series is about. As I discover nifty stuff about Resolve 12, I’ll point them out right here in this Little Gems series.


Imagine you’re working on a 300-shot timeline with a ‘letterbox mask’ on the top-most tracks

What do I mean by that? Notice in this next screenshot how I’ve got two long clips on Tracks V3 & V4… they’re the same full frame black .jpg, cropped to create a letterbox.

All tracks active in the Color Page of DaVinci Resolve 12

Notice how all four tracks are active. Also notice Shots 1 and 2 are the full-frame black overlays for letterboxing.

Also notice how the black JPEGs are also shots 1 & 2 in our thumbnail timeline. Why have we used these JPEGs instead of Resolve’s built-in letterboxing tools?

There are a few flashback sequences where the Letterbox is supposed to disappear and the image goes full screen

This makes masking with Resolve’s built-in toolset a little tricky and using top-level tracks just for letterboxing makes a ton of sense.  But there’s a problem and it was posted on Blackmagic’s DaVinci Resolve forum a few days after the launch of DaVinci Resolve 12 Public Beta 1.

Here’s the unexpected problem that the Original Poster found when navigating the timeline with top track letterboxing while color grading:

The trouble is, when I’m grading the clips on track V1, and I pause playback, the clip on V5 gets selected, so then the up and down arrow keys cause the playhead to jump far away from where I was working.

Elliott Balsley

If you’ve color graded more than a handful of jobs on DaVinci Resolve, you know precisely what Elliott is experiencing. Basically… every time he pauses playback, Resolve re-selects those top-level shots as the active shots. If he up- or down- arrows, he jumps to the first or last frame of those shots.

In a 30 minute sequence, that’s a major annoyance.

Before DaVinci Resolve 12, the only way to solve this navigation problem was to turn those top-level tracks off, hiding the letterboxing. And if you’ve ever graded a project that was shot full frame but protected for the letterbox, you know your color grading decisions change if that letterbox is turned off vs turned on.

It’s a maddening predicament…

You need the track turned on for color grading, but you can’t navigate shot-to-shot using the keyboard without turning the track off. This gets us to…

Little Gem #2: ‘Ignore Track for Transport’

DaVinci Resolve’s Product Manager, Peter Chamberlin, chimed in with a solution that’s brand new in DaVinci Resolve 12:

There is a new feature in v12. On the color page, hold option key and select the track number on the far [Left Hand Side] of the track that you wish to be ignored for transport selection. The track number is red when in this mode.

This will hide items on this track from the thumbnails but when the CTI is over those clips you will still see their impact on the viewer.

Ideal for mattes, grain, titles, etc.

Peter Chamberlin, DaVinci Resolve Forums

Two tracks are ignored for timeline navigation in DaVinci Resolve 12

Little Gem #2: After option-clicking on Tracks 3 & 4, they turn red. The tracks are active but ignored for timeline navigation purposes while in the Color Page.

In the screenshot above, tracks 3 & 4 are active, but ignored

Notice how they’ve disappeared from the thumbnail navigation, no longer labeled as Shots 1 & 2. Now you can have overlays spanning entire timelines, keep them active for color grading decision-making and never have them get in the way of navigating the timeline on the Color page.

THAT is the definition of a power users’ Little Gem 🙂

– pat

Comments { 2 }